A self-watering planter is a system that allows a plant to soak up water as needed. The self-watering system is usually placed at the bottom of the planter or drips from above.
Self-watering planters supply a steady stream of water for plants without over or under watering the plant. This article lists nine simple planters that can be made at home to keep houseplants watered and retain all the benefits of houseplants.
Self Watering Planter #1: Upside Down Plastic Bottle
The upside-down plastic bottle self-watering planter is simple to make and can be created from a used plastic bottle.
This planter won’t cost you extra money and you can create multiple planters for small plants. Add a creative flair by decorating or painting the bottles.
How to Make This Self Watering Planter
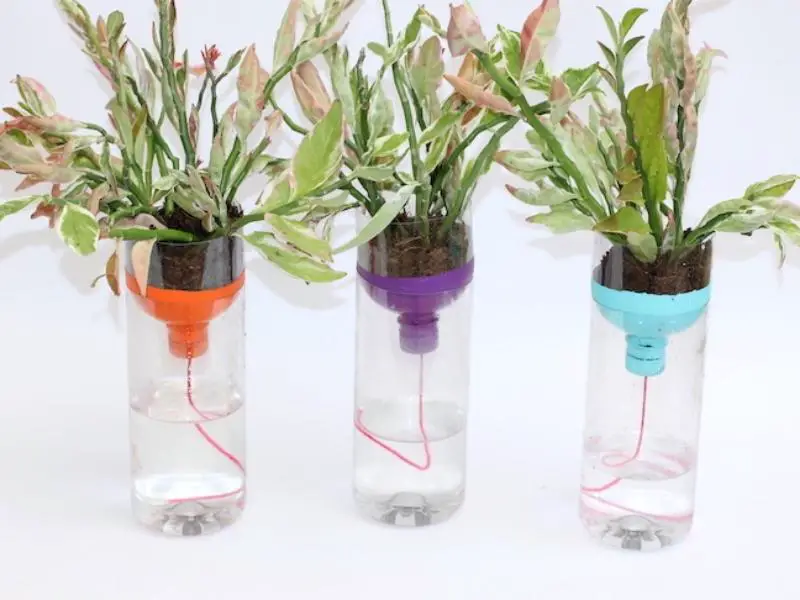
The upside-down plastic bottle planter is made by cutting a used plastic bottle in half. Fill the bottom half with water for the plant.
Keep the lid on the top half, make a small hole in the lid and pull a string through. Turn the top half upside down and place it into the bottom half so the string sits in the water.
Fill the flipped top half with stones and soil along with the plant. The string will draw the water up into the soil where the plant roots will take in as much water as the plant needs.
Keep an eye on the bottom half to refill the water when it gets too low.
Self Watering Planter #2: Sports Bottle
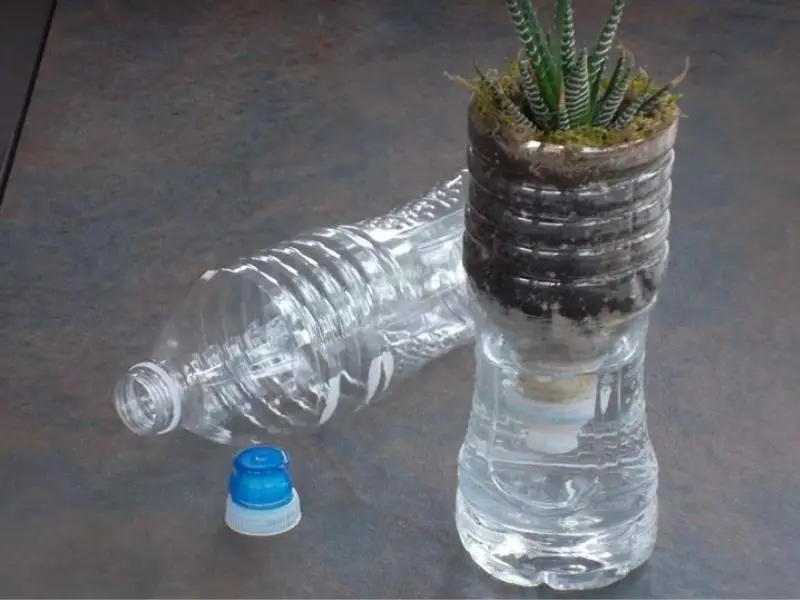
The sports bottle self-watering planter is similar to the upside-down bottle method, however, there is no string needed. The sports bottle method works well with aquarium gravel and moss mixed into the soil.
The holes in the sports bottle lid will allow water to be drawn up into the soil and moss to provide water to the plant.
How to Make This Self Watering Planter
To create this planter, you only need a sports bottle and a pair of scissors.
- First, cut the bottle in half and pour water into the bottom half
- Next, turn the top half upside down with the lid still on and fill it with soil and the plant
- Lastly, place the top half inside the bottom half so the sports bottle lid is sitting halfway in the water
Keep checking the water level to make sure the lid is always submerged in the water.
Self Watering Planter #3: Buried Plastic Bottle
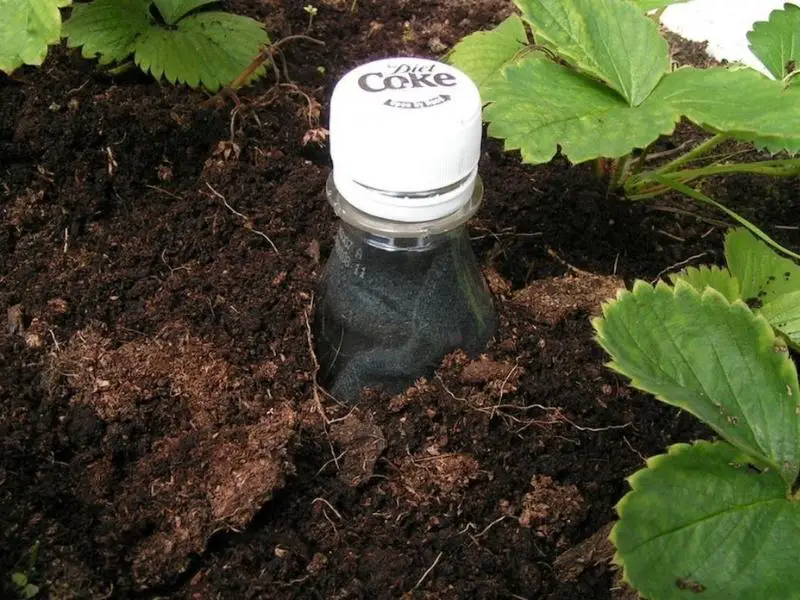
The buried bottle self-watering planter is a great method to keep the water source hidden. This method works well when the plant is in deep soil with plenty of space around the plant.
The bottle is buried next to the plant with multiple holes to allow the water to seep out into the soil.
The roots of the plant will draw the water in when the plant needs it. This method will also encourage strong root growth for the plant.
How to Make This Self Watering Planter
An empty two-liter bottle and a knife are all that are needed for this self-watering planter. Start by poking small holes all over the sides of the water bottle with the knife.
Optionally, cut off the top or bottom of the bottle to easily fill the bottle with water.
Once the holes have been created, dig a hole next to the plant and place the bottle into the hole. Keep the open side at the top and pack soil around the bottle so that only the opening is visible.
Pour water into the bottle right up to the top and the water will seep out of the holes and into the soil.
The roots of the plant will grow toward the bottle and soak up as much water as needed. Monitor the opening to see when to add more water to the bottle.
Self Watering Planter #4: Upside Down Wine Bottle
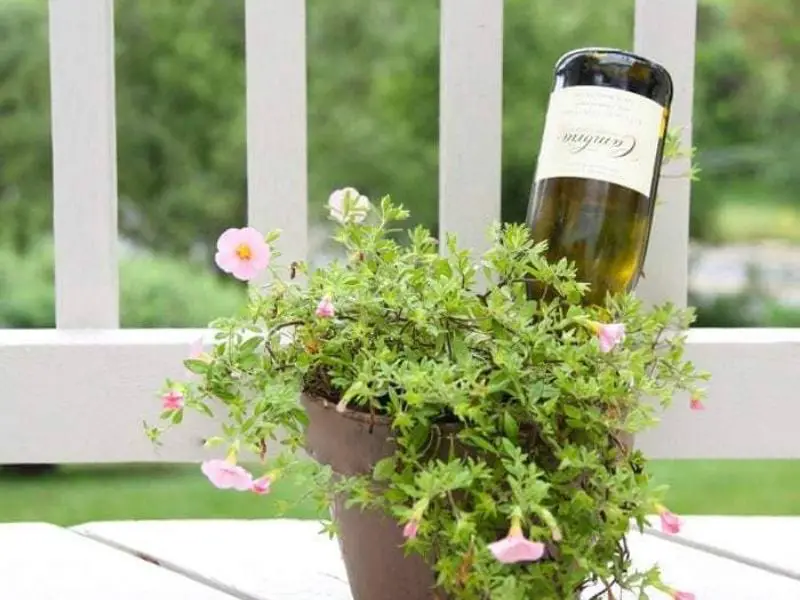
The upside-down wine bottle self-watering planter adds an eccentric touch to your plants. This method is also a great way to upcycle old wine bottles. Be sure to keep the wine bottle corks for this method.
This self-watering planter needs a bit more effort as the hardest part is drilling a hole in the cork. The wine bottle can be refilled as many times as necessary and used for any plant.
How to Make This Self Watering Planter
After enjoying a bottle of wine, keep the cork handy and rinse the bottle well. The only other tool needed for this method is a drill or knife for the cork.
- Start by drilling a hole in the cork with a drill, a knife, or any sharp object that is available. The size of the hole will depend on how much water flow the plant needs
- Next, fill the wine bottle with water and seal it closed with the cork
- Finally, tip the wine bottle over and push it into the soil next to the plant. Make sure the neck of the wine bottle is fully buried
The water will seep out of the hole in the cork and keep the plant watered until the bottle empties. Keep an eye out for when to refill the bottle.
Widen the hole in the cork if the plant needs a faster stream of water.
Self Watering Planter #5: Cup and String
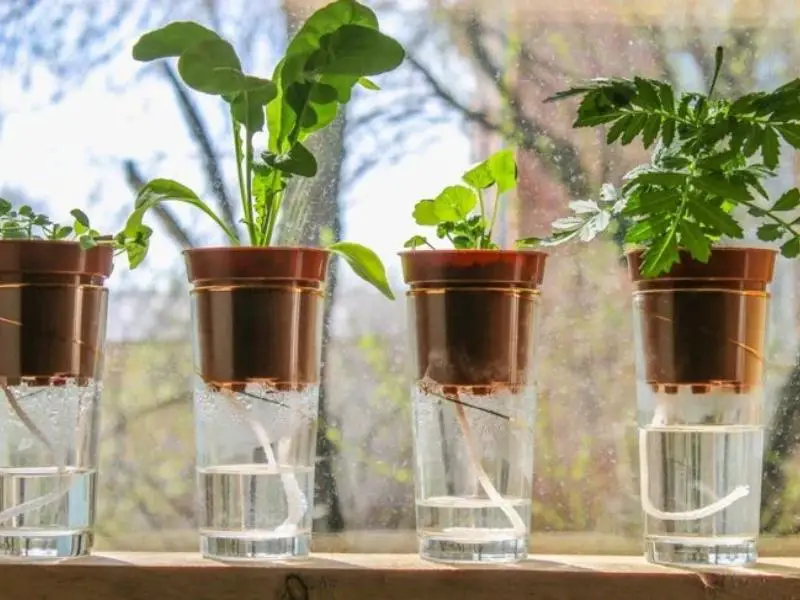
The cup and string self-watering planter is simple to make and offers a more elegant-looking planter than the upside-down bottle.
Any type of cup can be used as the base to ensure the cup matches the area where the plants are placed.
How to Make This Self Watering Planter
Any type of cup or glass can be used to make this self-watering planter with a piece of string. The length of the string will depend on the cup used.
The only tricky part with this planter is that there needs to be a hole in the planter.
To create this homemade planter, select a cup and fill it halfway with water. Take the planter that holds the plant and thread a piece of string through the bottom.
Once the string is in place, put the planter on top or slightly inside the cup, making sure the string is touching the water. The cup can even be positioned next to the planter with the string hanging over into the soil.
The string will absorb the water and draw it up into the soil for the plant to drink. Keep the cup filled with enough water so the string is always touching the water.
Self Watering Planter #6: Plant Bath
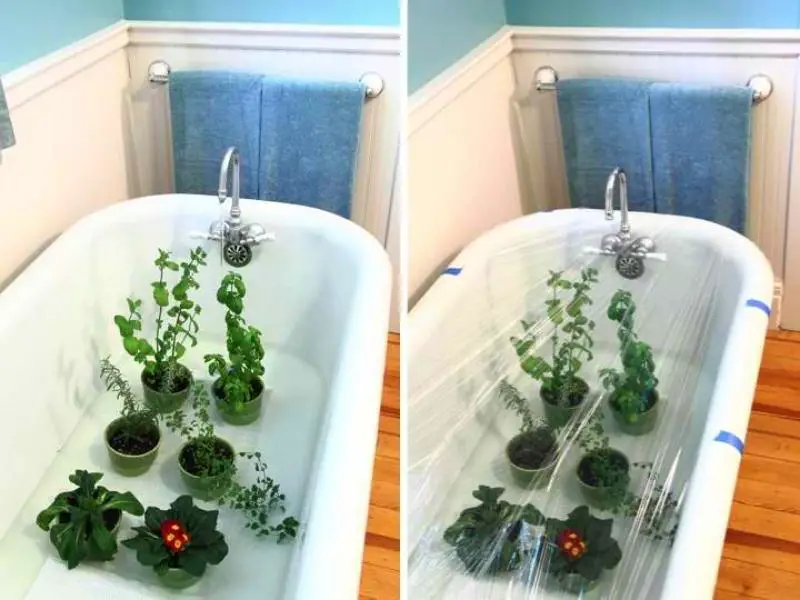
A plant bath is a good method to use when going away on holiday while needing to keep houseplants watered. A plant bath in an actual bathtub will provide enough water for plants for up to a week.
This method can be changed slightly and can be used as a permanent self-watering planter. The plant bath will only work for plants that are in containers with drainage holes.
How to Make This Self Watering Planter
A plant bath can be created in an actual bathtub at home. Or, as a more permanent option, use a large tray instead of the bathtub.
Start by pouring water into the bathtub or large tray until it is just below the top of the smallest pot. The water should not flow over into the top of the planter.
Place a towel underneath the planters to prevent any scratches on the bathtub. The drainage holes will allow the soil to draw up water from the bathtub or tray to keep the plants thriving.
Leave the plants in the bath for as long as necessary until the plants can be watered regularly again. When using a tray as a permanent solution, make sure to keep it filled with enough water at all times.
Self Watering Planter #7: Drip Wicking System
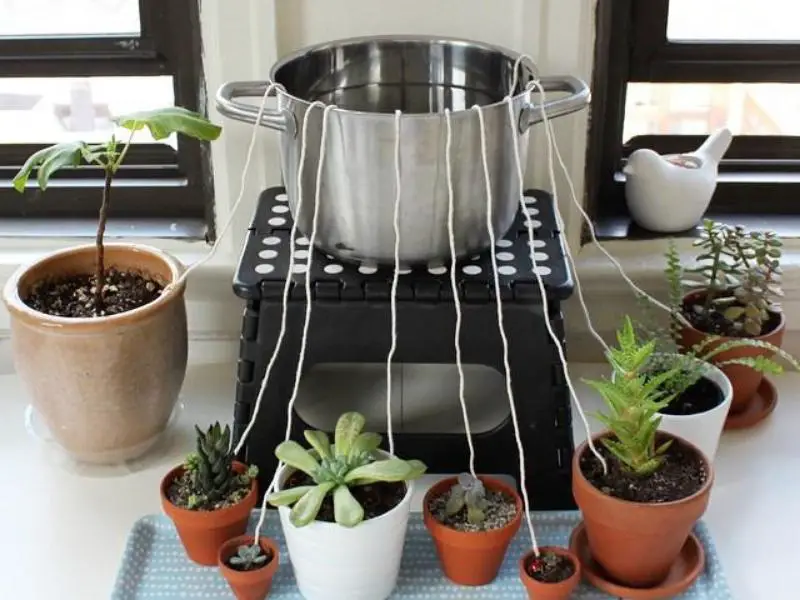
The drip wicking system is a good option to water multiple plants at a time. This system relies on gravity to thoroughly water the plants, so is great for plants that need a good soaking.
This method is good for watering plants for a few weeks, depending on how big the water source is.
How to Make This Self Watering Planter
To create this self-watering planter, a large bowl or bucket is needed along with a cotton or other absorbent string.
Use scissors to cut as many pieces of string as needed depending on how many plants will be watered.
Fill the bowl or bucket with water and place it on a higher level than the plants. Put each string in the water, giving the string enough slack to lay on the bottom of the bowl.
The other end of each string should be placed a few inches into the soil of each plant. Use a pencil or stick to push the string in deep enough.
The water will be absorbed by the string and gravity will help pull the water down to the soil quicker than wicking methods that draw the water upwards.
Self Watering Planter #8: Plant Saucer
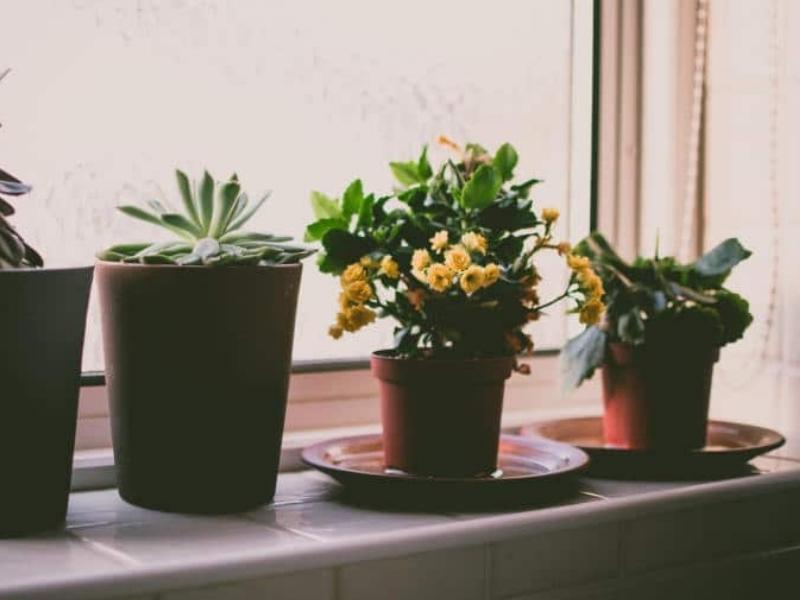
The saucer self-watering planter method is a cheap and simple way to water succulents and plants that don’t need much water. This method creates a plant bath on a smaller scale to water one plant at a time.
The plant saucer method will only work on plants that have drainage holes at the bottom of the container it is planted in.
How to Make This Self Watering Planter
A planter with drainage holes and a deep lipped saucer is all that is needed for this self-watering method.
The saucer must be larger than the pot, so the pot will fit into it with extra space for water to stay around the pot.
To create this self-watering planter, pour water into the saucer before placing it under the plant. The water will be pulled through the drainage holes by the soil and roots.
Self Watering Planter #9: Plastic Bag DIY Greenhouse
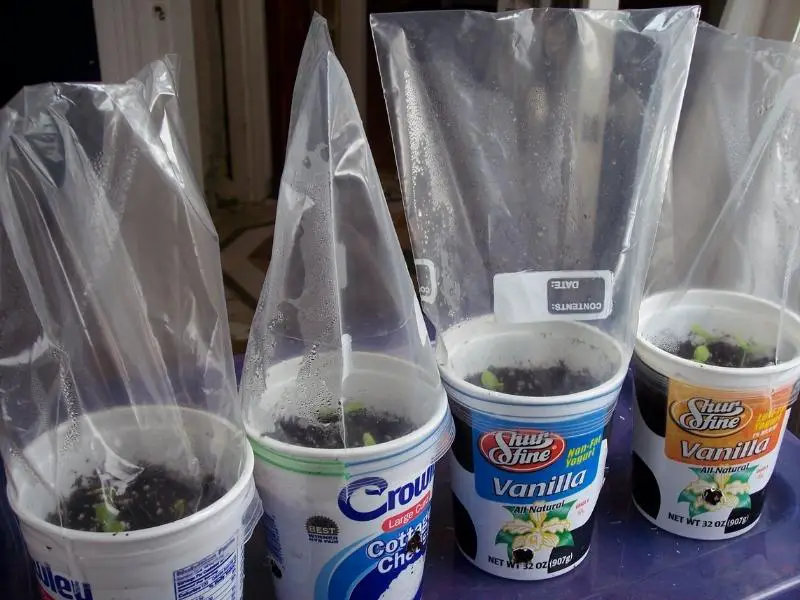
The plastic bag greenhouse is a good method to use when leaving your plants alone for months at a time.
The plastic bag greenhouse is a good option while you’re away from home and plants aren’t on display.
The greenhouse method is not recommended for succulents or plants in direct sunlight, because this method will cause overheating and shriveled leaves or plant death.
How to Make This Self Watering Planter
To create the homemade greenhouse for a plant, a few items are needed:
- Four wooden stakes
- A plastic bag big enough to cover the plant completely
To create the homemade greenhouse, place the four wooden stakes in each corner of the pot or just around the plant if it is a round pot.
The stakes should be placed at the edge of the pot to keep the plastic bag away from the plant.
Water the plant with the same amount of water as it usually needs – don’t overwater the plant. The greenhouse will recycle the correct amount of water that is needed.
Place the plastic bag around the entire plant, using the stakes to hold the bag in place and prevent the bag from suffocating the plant.
The bag should not be wrapped around the plant and the leaves should only barely touch the bag or not touch it at all.
The plastic bag will act as a greenhouse by catching the water droplets as they evaporate. These droplets will then fall back onto the plant, giving it enough water throughout the time it is in the bag.
Place the bag in indirect sunlight to prevent the plant from overheating.