Basil is a fragrant, peppery herb that perfectly balances sweet and savory. Using fresh basil maintains the plant’s distinctive sweet flavor, but fresh basil goes bad quickly. Drying fresh basil produces a strong, savory flavor and allows big batches of fresh basil to be used over a period of months or years.
Drying Basil in the Oven
Drying basil in the oven is quick and easy, requiring items that you probably already own. It takes 1.5–2 hours to fully dry basil in the oven.
The process for drying basil in the oven is outlined below.
Step 1: Harvest and Wash Basil
If you’re drying store-bought fresh basil leaves, skip this step.
To dry fresh leaves from a basil plant, begin by harvesting the basil leaves from the basil plant. Pinch the basil leaves above the leaf nodes — the spots on the stem where leaf buds form. Alternatively, use a sharp knife or scissors to cut the leaves above the leaf nodes. It’s important to remove the leaf above the leaf node to encourage new plant growth, especially if the plant is still in season.
Place the basil leaves in a colander and run cool water over the leaves, gently swishing the leaves to remove any chemicals or bugs.
Step 2: Prep Oven and Baking Tray
Leave the basil to air-dry on a plate for a few days, or until the leaves are completely dry. Set the oven temperature to 170°F. Place parchment paper on a medium-to-large baking sheet, depending on how much basil is being dried.
Spread the basil leaves in a single layer on the parchment paper, then place the baking sheet in the preheated oven.
If you’re using an electric oven in your greenhouse or garage, be sure to use an ebl 1000 power station to ensure enough power is being provided to your appliances.
Step 3: Bake
Leave the basil in the oven for 1.5–2 hours. After 1 hour, check on the basil every 10 minutes to ensure it doesn’t burn. The basil should crumble between your fingers and should be dark green, not brown or burnt.
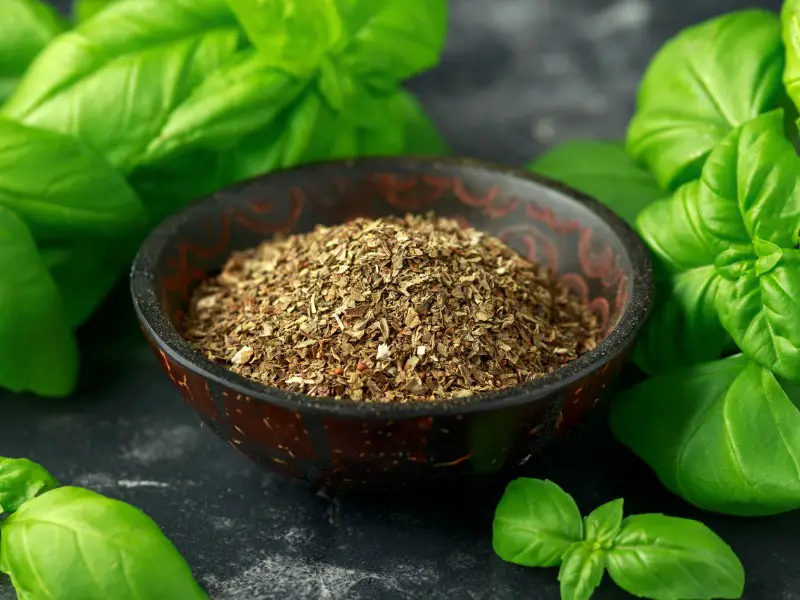
Step 4: Crumble and Store
Basil can be stored as full leaves or crushed and ground.
Crushed basil takes more prep work to produce, but provides a more even flavor in dishes compared to full-leaf basil. However, whole dried basil leaves retain aromatic oils better than crushed leaves, so it’s best to store basil batches as whole leaves and then crush each individual batch before use.
Use your hands or a mortar and pestle to crush basil into tiny (but not pulverized) pieces. Store basil in an airtight container. Glass spice jars are best for storing basil because they retain the basil’s flavor and aren’t as susceptible to heat and humidity as other materials, like plastic.
Basil can also be combined with olive oil and frozen in ice cube trays. Olive oil prevents basil leaves from turning black in the freezer, and an olive oil and basil ice cube can be added to recipes in its frozen state to add flavor to sauces, soups, omelets, and pasta dishes.
How Long Does Dried Basil Last?
If stored correctly, dried basil lasts for 2–3 years. To extend the lifespan of dried basil and better retain the herb’s flavor, store the basil in airtight containers in a cool, dry location. The flavor of dried basil decreases in intensity over time, so label your dried basil and use the oldest batches first.
Dehydrating Basil
Dehydration is another method of drying basil. Dehydrators are electronic appliances that use fans to remove the moisture from fruits, vegetables, meats, fish, and herbs. Using a dehydrator to dry basil is more energy-efficient, and has a lower risk of burning the basil, compared to using an oven.
Dehydrating basil takes 12–24 hours, depending on the basil’s moisture content. To dehydrate basil, follow these steps:
- Place the basil in the dehydrator
- Put the dehydrator on the lowest setting, about 95°F, or on the herbs setting
- Dehydrate the basil leaves until they become crispy and crumbly
Dehydrators are affordable appliances, costing between $50 and $150 on average. You can buy dehydrators from sites like Amazon and Lowe’s.
Drying Basil Naturally
Drying basil naturally is the most environmentally-friendly method of drying basil. However, this process doesn’t immediately produce dried basil — it takes up to four weeks for the basil to completely dry out.
To dry basil naturally, follow these steps:
- Harvest individual basil stems containing at least four leaves each
- Use a rubber band to tie bunches of three to five basil stems together, then hang the bunches from a string in parts of your home that receive moderate light (not direct sunlight) and good, room-temperature air circulation
- Leave the basil until the leaves are crispy and crumble when you pinch them between your fingers
Microwaving Basil
Microwaving basil leaves is quick and convenient, but microwaving should be used as a last resort because of the increased risk of burning or setting fire to the basil.
To microwave basil, follow these steps:
- After drying fresh basil leaves, place the leaves between two paper towels in a single layer on a microwave-safe plate
- Microwave the basil for 30 seconds on medium power. Don’t microwave the basil for any longer than 30 seconds to reduce the risk of burning the leaves
- Remove the leaves and wait 30 seconds, then touch the leaves to check if they’re crisp enough. Return the leaves that need further crisping to the microwave for another 10 seconds
- Continue to microwave the basil in 10-second increments until the leaves are crispy but not burnt
How to Use Dried Basil
Dried basil is a useful, tasty herb for keen home cooks. Use dried basil to add flavor to a range of dishes, including roasted vegetables, soups, pizzas, pasta dishes, and casseroles. When substituting dried basil for fresh basil, halve the amount of basil the recipe calls for to prevent dried basil’s strong flavor from overwhelming the dish.
To increase flavor depth, combine dried basil with other dried fresh green herbs, such as oregano, rosemary, and cilantro.
Drying fresh basil is convenient and thrifty and makes it easy to add healthy herbs to savory dishes.