Starting seeds is super fun & a lot cheaper than buying seedlings.
However, once you start buying seeding trays, pots, grow lights, and mini-greenhouses they can add up in cost fast.
These supplies are worth investing in for the long run, but it’s nice to get ideas for frugal gardening too.
There are plenty of large greenhouse kits or small DIY greenhouse projects to help with growing.
If you’re not up for any of these portable mini greenhouse projects, you can use bigger portable greenhouses.
I’ve been using them for years and they’re inexpensive to buy and well worth it.
Before we delve more deeply into the equipment you’ll need, you may need a bit more information to help you move forward and think about the right equipment for you.
This may all be new to you. Perhaps you are starting out in seed starting. Maybe you are a seed starter starter.
So here are some of the basics.
Seed starting, also known as germinating seeds, is growing plants from seed.
It is an immensely satisfying and popular type of gardening. You bring a plant to life and watch it grow from start to finish. You literally get the seeds started.
To start seeds, or to start them germinating and growing, the essential things you need are moisture and warmth.
Seeds are kept dry specifically to prevent them from germinating.
So to bring them to life you need to add water and keep them warm.
Here are the basic things you’ll need to do that:
Seed Starter Seeds
Without stating the obvious you will need seeds, but it’s more about exactly what you want to grow and what you can grow where you live.
Do you want to grow your own healthier vegetables? Do you want to have a small herb garden? Or do you want a mountain of beautiful flowers?
While on the subject of seeds don’t forget you don’t even have to buy all your seeds. You can start seed saving.
You can save seeds from foods you’ve bought and from the crops you grow and use them in your seed starting.
That really is the circle of life.
Seed Starter Mix
While it is possible to start some seeds without soil/earth (some of you may remember in your childhood growing watercress on a wet flannel) generally speaking you’ll need some kind of earthy material to place the seeds into.
Apart from being the base to hold the growing roots and plant, it helps retain the correct amount of moisture.
It’s important to remember that the seed starting mix is a more sterile environment for starting plants than regular soil or potting mix. It is not a soil as such.
And you need to be careful using things such as potting soil, compost, organic matter, and coffee grounds as they may contain things that will be harmful to the seedlings or at least hinder their growth.
There are many mixes specifically for starting seeds made using various components. You need to make sure you choose the right one for the plant you want to grow from seed.
Don’t forget, you’re not looking for potting soil. You need a seed starting mix.
And also you will need to add the correct nutrients to your growing seedlings.
Top Tip: Add some water and mix it in to your seed starting mix before putting it into the containers.
It’s easier to get the water content right to start, and makes it easier to handle if it is already a bit damp.
Seed Starter Peat Pellets
Another option to consider is using peat pellets. Peat pellets are compact, blocks of mesh-covered peat that can be used to start your seeds. They are almost like a solid tea bag.
They are placed in trays designed to hold lots of them, you water them, and they soften and expand so you can place the starter seeds into them.
Seed Starter Pots
You will need some sort of containers to hold your mix and starting seeds.
Normally you need a container that holds each plant individually so that individual plants can be transplanted directly when the time is right.
They need to keep in some moisture but also allow excess water to drain away.
You have various options to choose from.
Seed Starter Plastic Containers
The most commonly used are plastic containers designed specifically for starting seeds.
These are available as individual pots for each seedling or plastic growing trays with many individual pots built in to keep each plant separate.
When they are ready to be planted directly in the garden you pop out each plant and mix from its own section or break that section off before you plant it in the ground.
Egg Shells, Toilet Rolls, and More
You may be wondering what these have to do with seed starting containers. Well, they fall at the other end of the spectrum in the creative and eco-friendly recycling options.
And they save money.
You can save your egg shells from breakfast and use them as individual seed starter pots. Fill with starting mix and pop in the starter seeds.
What could be easier and better for the environment than re-using leftover egg shells?
You can also save the egg cartons that the eggs came in and use them to grow six or twelve seedlings.
Like commercial starting seed trays egg cartons keeps them individually, yet conveniently together in a readymade tray.
Both the plastic and cardboard egg cartons can be used.
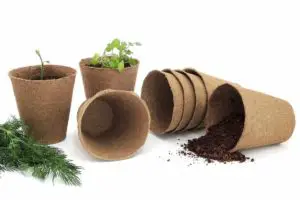
The cardboard ones are probably the more environmentally friendly option as when it’s transplant time they can be planted directly in the ground outdoors in the garden.
They also drain naturally through the porous cardboard so less likely to get overwatered.
If the plastic ones don’t have holes in already just pierce or cut a few for drainage. If you’re careful you may be able to re-use some and help be a bit more green.
Toilet paper rolls. That’s right. Another great idea is to use a toilet paper roll as an individual planting pot.
Simply place the rolls (after you’ve used all the toilet paper, of course!) on their end on a tray and fill with the mix and seeds.
Like with the cardboard egg boxes, the toilet paper rolls drain naturally and can be planted directly in the garden.
Used newspapers are another good option for re-using something you would otherwise throw away.
All you need to do is cut the newspaper into strips slightly wider than a food can. Get a few of these strips together, roll them around a food can to create the pot shape.
Then fold the excess under to make a base.
Don’t forget to remove the can afterward!
Another advantage of the newspaper pots is that they too can be planted straight in the ground as they’ll rot away.
Recycle Plastic Pots
Many plastic containers and little pots that you would normally throw away can instead be re-used as pots for your seed starting.
Examples are yogurt containers, strawberry containers, and plastic cups like red solo cups.
You’ll need to make some drain holes and then just fill the bottom half of each container with your mix before planting the seeds.
Plastic milk bottles are another item you can save and recycle to use as a combined pot and mini greenhouse for your seed starting.
See below for more information from The 104 Homestead on this simple idea.
Seed Starter Greenhouses
A greenhouse is essential if you want to extend your growing season.
A greenhouse traps the warmth from sunlight to keep your starting seeds warm when the weather may not be warm enough outside.
This gives you a head start on your seed starting as you can start seeds when it’s still too cold to plant directly outdoors.
If you use a greenhouse you can normally begin seed starting around 6 weeks before the last frost on the ground.
The time you start depends on which seeds you are planting. The seed packet will tell you this.
Then when the weather is just right you can transplant the plants outdoors.
A greenhouse also helps keep in the moisture by keeping the seeds inside a contained environment protecting them from wind and stopping them from drying out.
But you may not need or have the space or the budget for a shed-sized greenhouse.
So if you are thinking of starting seeds in a small greenhouse, we are here to help you find the best small greenhouse for starting seeds.
You may want to buy a cheap mini greenhouse or be creative and go down the route of a homemade seed starter greenhouse.
A DIY mini greenhouse is cheaper and a more efficient use of space.
You can have a seed starter greenhouse that is just the right size for the space you have and how much you want to grow, whether you have a large garden, a small balcony, or a window ledge.
Seed Starter Lighting
You may be lucky enough to get sufficient sunlight where you live to grow your seedlings from your starter seeds but sometimes some artificial light is helpful.
It may even be essential in some regions with less winter sun and colder temperatures.
Lighting is not just for the UV light to help your plants grow. It is also for the warmth to protect them from cold spring or fall weather.
Lighting is another way to give you a jump start and prolong your growing season.
So buying specific grow lights for your seed starting project can be well worth the investment.
Patience
You will need plenty of patience as even the fastest-growing plants grow slowly. For some, this may sound like a downside. But this is really a large part of the pleasure of seed starting.
To see the tiny shoots appear from your starting seeds after you have nurtured them, to see them poke out above the soil, and little by little watch them grow into full-size plants and produce delicious homegrown vegetables, or fragrant herbs, or beautiful and colorful flowers.
It’s quite therapeutic and very satisfying.
Starting Seeds Tips
If you would like more detailed information we have compiled all the information you need to learn how to get started with seed starting and progress to become an expert seed starter.
The how and when and what and the little extras and great ideas that make seed starting more productive, as well as more satisfying.
- Seed starting for beginners
- When to start planting seeds
- Garden planning like a rock star
- How to choose seeds & use seed inventory spreadsheets
- Ultimate printable garden planner
- Create a planting schedule
This post is full of ideas for creating cheap mini greenhouses that you can use for seed starting.
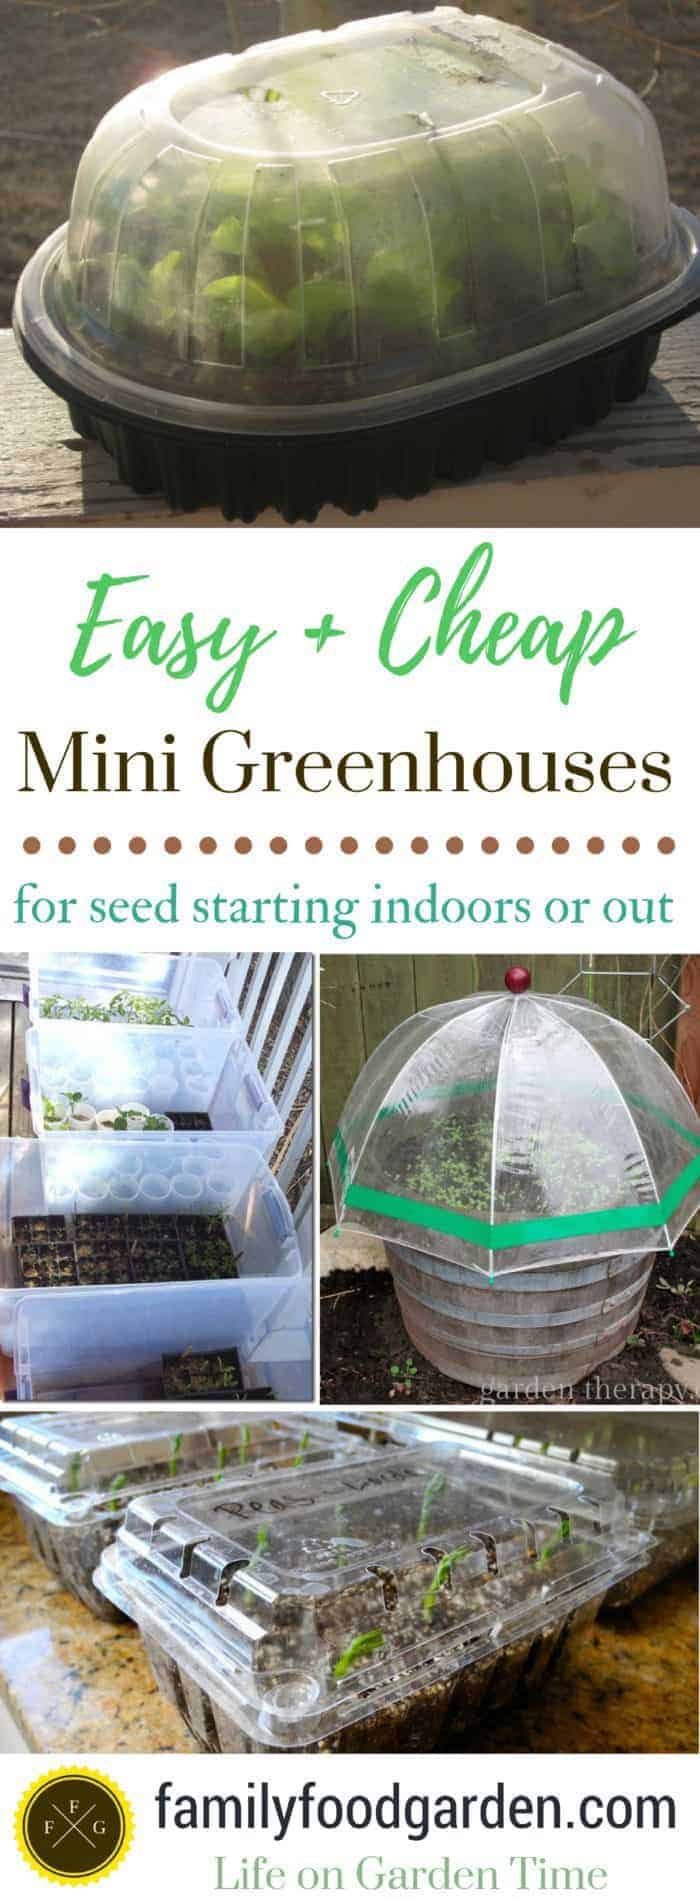
Seed Starting Greenhouses
Create mini greenhouses with clear plastic bins from the Prairie Cottage.
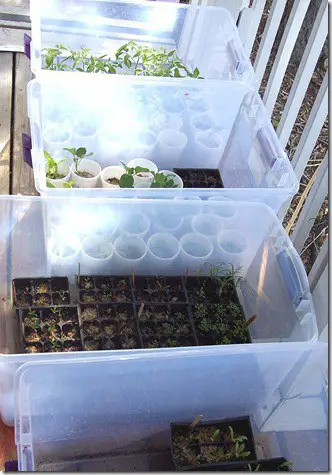
This is a great idea from The Prairie Cottage for a readily available, ready-made, and portable mini seed greenhouse.
These plastic bins or storage containers with lids can be easily bought in many places.
They are easily moved around, from outside in the garden when the sun is out to more protected indoors or moved under grow lights.
And the lids can be taken off when easy access is needed and put back on for more protection.
You can fill them with pots to create a mini container garden within each plastic container.
Use cedar twigs to create mini greenhouses from Eartheasy.
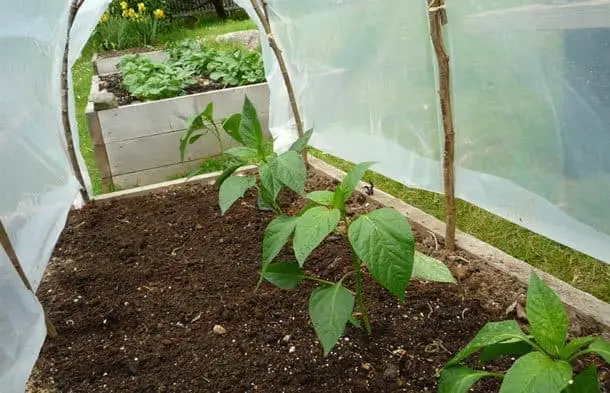
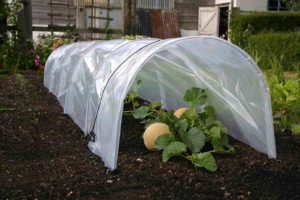
If you like the idea of building a mini tunnel type greenhouse or cloche then here’s a great way to do it yourself and Eartheasy shows you how.
Using flexible branches like those from a cedar or conifer, trim and sharpen them and stick them into the ground forming a loop shape.
Add a straight branch across the top for support and cover with clear plastic wrap over the branches.
As these are used outdoors they are more useful to use in late spring to cover the ground in the garden to give young plants a little extra protection from chilly snaps at that time of year.
They can be moved to different areas and re-used.
Winter sowing in milk jugs from 104homestead.
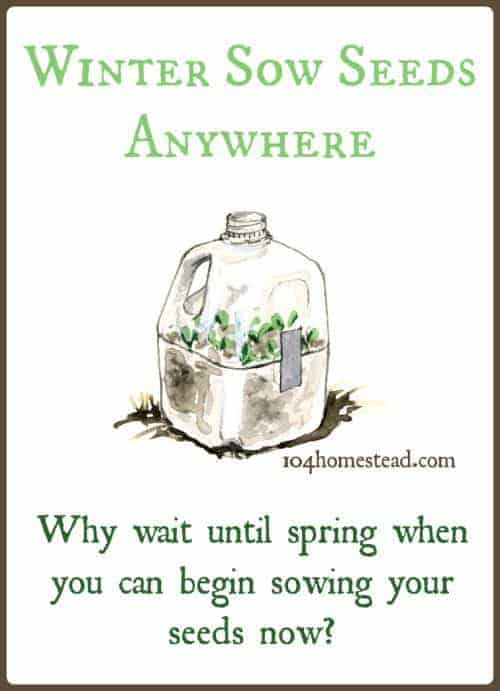
The 104 Homestead shows us how to make a DIY mini greenhouse from large plastic milk bottles.
The milk bottles are a clever idea because they are a combined pot and mini greenhouse.
Simply add some drainage holes on the bottom and sides.
Then about halfway up cut nearly all the way around, to make a lid, leaving around an inch attached to act as a ‘hinge’ for the lid.
They are small enough to be kept under cover and moved around and large enough to allow the plants and roots to grow.
Create a mini greenhouse with a shelf & plastic from Simply Natural Homestead.
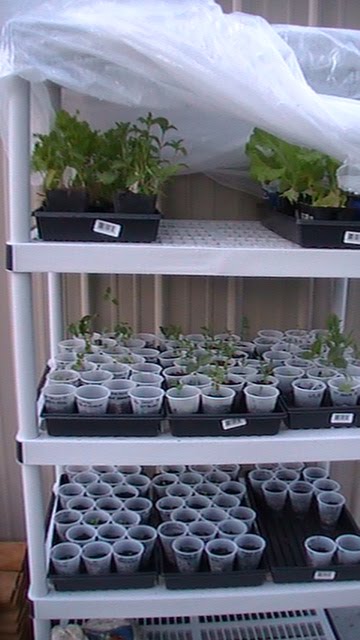
Using the ideas from Simply Natural Homestead you can build a small greenhouse for starting seeds from portable shelving units.
They are available at most DIY stores and pretty good value.
They take up very little floor space but can hold a surprising number of pots and containers on their shelves.
These are great for confined spaces like a balcony.
Just build the shelves as normal and cover them with plastic sheet for protection.
Yogurt containers or plastic cups arranged in a larger container fit on these shelving units well.
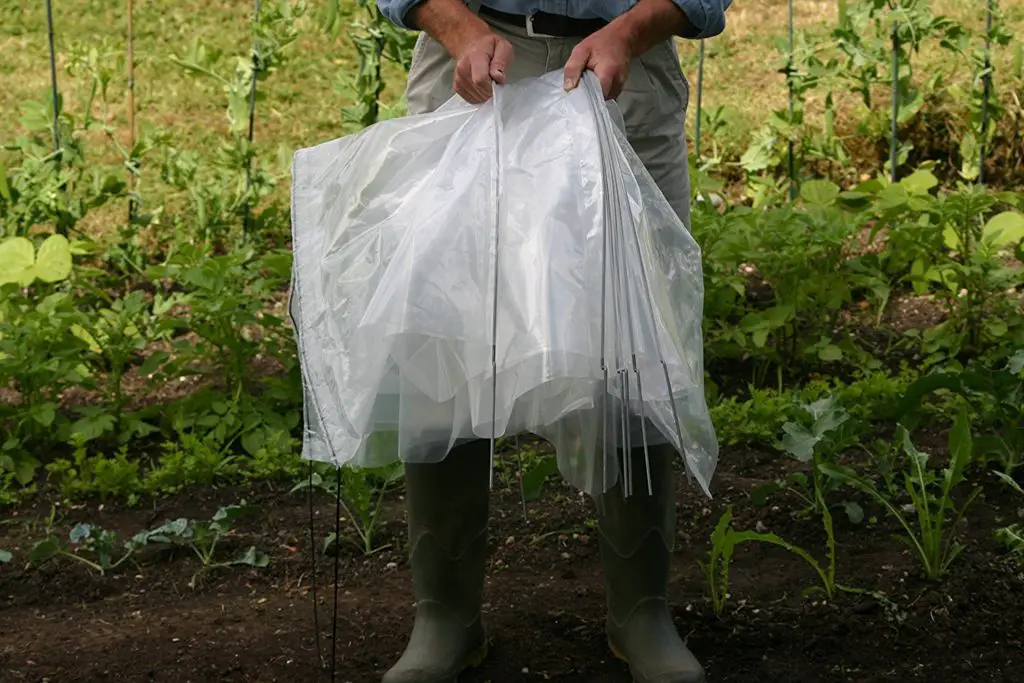
Clear plastic umbrella from Garden therapy
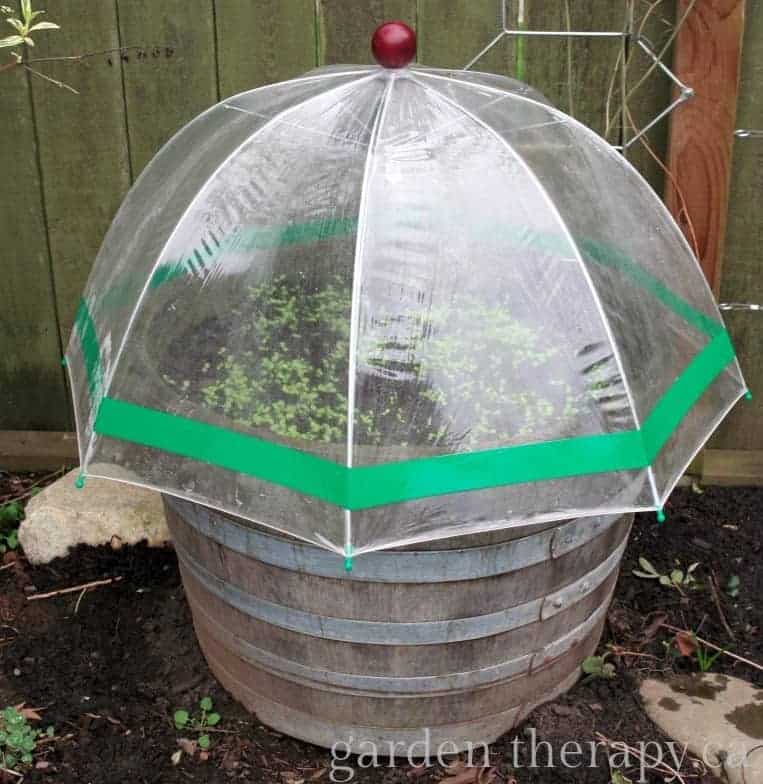
It doesn’t get much simpler than covering your started seeds and seedlings with a clear plastic umbrella.
You can buy the ones that are designed and sold specifically as mini greenhouses with an umbrella-type folding action.
Or you could use a regular clear plastic umbrella to protect and warm your seedlings.
They are very easy to lift up for watering and checking on your growing plants.
Recycled Plastic Product Container from Homesteading Downsized.
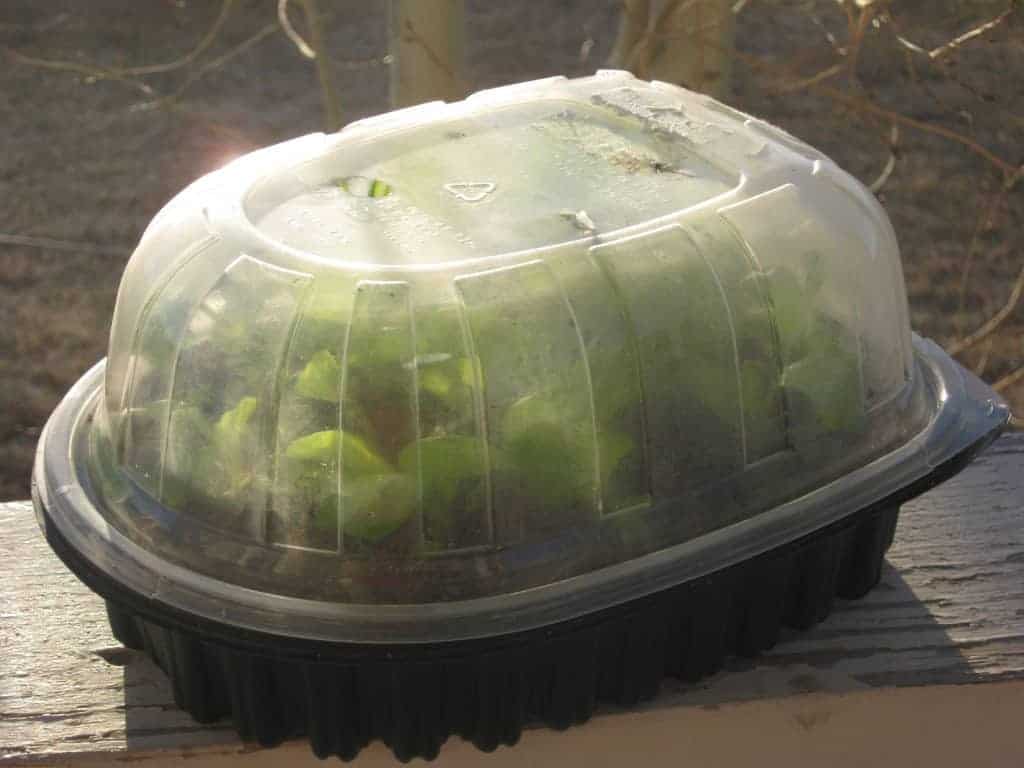
In this post, Homesteading Downsized shares the idea to re-use plastic food containers as a DIY mini greenhouse.
They recommend the type of container a rotisserie turkey comes in as they have a clear lid that clips on and off easily.
They suggest growing salad in them. We love that idea as it can be grown indoors by a window, easily accessible.
DIY detailed outdoor mini greenhouse from thinkmac.
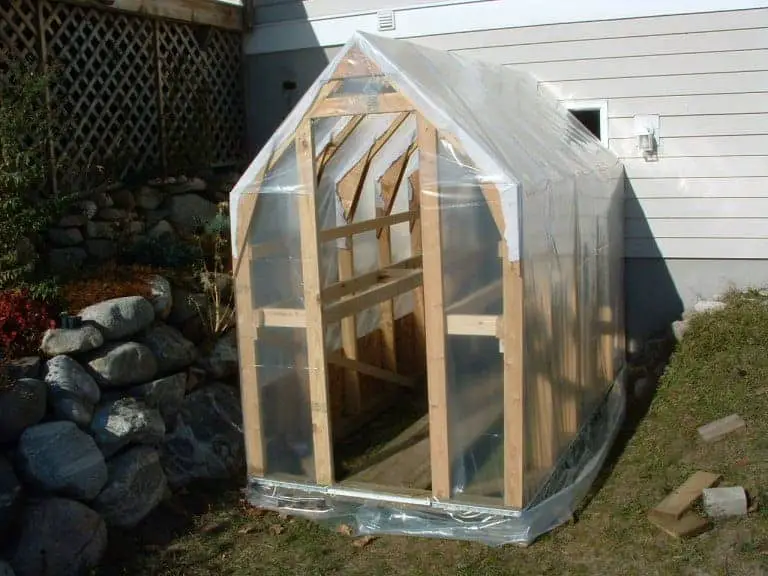
If you have the space in your garden for a small building then thinmac’s post at ThinMan’s Blog has step-by-step instructions on building a DIY greenhouse that isn’t so mini.
This is one for someone who is serious about building a good-sized DIY greenhouse.
It’s a solid timber frame construction building covered in plastic sheet giving you plenty of space for lots of containers, trays, and pots.
Strawberry container from a Song of Sixpence
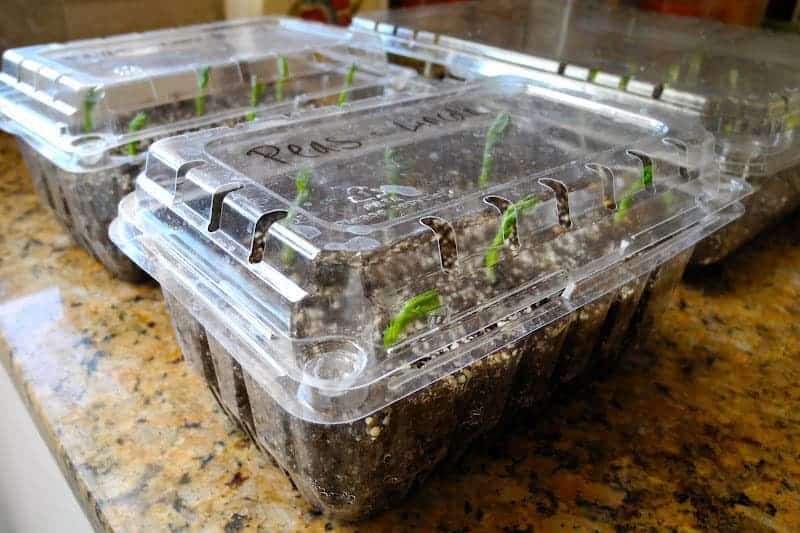
Here we see how easy it is to re-use the containers strawberries are packaged in at the store.
They are perfect as a DIY mini greenhouse as they are deep enough for planting, and already have drain holes and a lid built into them.
Whether you decide on a DIY greenhouse for seedlings, a cheap or free mini greenhouse or purchase a ready-made seed starting greenhouse we hope the information and tips we’ve given you here help you decide on the best seed starter greenhouse for you.
Good luck and we hope you have many hours of happy gardening and productive seed starting!

Thanks for all the tips and ideas from your website, family food garden.com
I enjoyed your ideas using recycled containers!
Love all these ideas! Thanks for sharing.
So I have done the strawberry containers and yogurt containers, but I never though of the chicken container. So excited to start my herbs in there.
Hope folks will use recycled plastic and not buy plastic. Cringe at the idea of buying plastic bins shown as an example.
Thanks for the ideas! I can hardly wait to buy seeds!
Save your plastic water bottles …cut in half…fill bottom with water….turn the top upside down and fill with dirt ( keep your finger on the cap opening while doing so ) , put the seeds in and place on top of the bottom half filled with water….just need to keep water in the bottom half and watch them grow
Could you show a picture of the water bottle suggestions please?
I would like to grow herbs in my small kitchen.ANy suggestions
I also used egg cartons, and my local store sells eggs in cardboard cartons instead of styrofoam. I put one or two seeds in each, when time to transplant from there either to something larger or outside, I separate the individual portions, open the bottom and place the entire (small) cardboard container (not styrofoam) and plant the entire thing. The cardboard helps protect the tiny roots during the transplant. I love the milk carton cut in half, too. Great for ease of watering them.
I love the ideas posted in here. my favorite is the biggest outdoor green house. I wished you had posdted a way to download the specs to build it. Thank you for the great ideas.
I love the recycle, reuse ideas like the berry carton and reused chicken container! So much better than buying more plastic! 🌱🌱🌱
Those plastic containers for salads- Cesar Salads, BLT salads, etc purchased at Walmart or Jewels grocery stores can also be adapted for DIY seedings.
Thank you for sharing that detail. It was fascinating and insightful. Continue to share useful resources over these blogs.