

Canning is one of the many food preservation methods of the past (the others are brining and drying). Or is it?
If you have a garden, even a small one, you tend to produce a lot of vegetables. At some point, you are giving bags of vegetables to the neighbors, bringing bags to the office to leave in the break room… we’ve all been there.
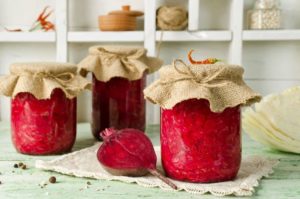
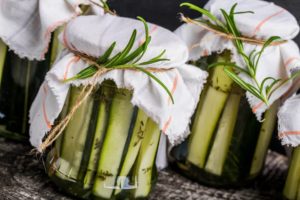
Canning is a way to keep all those vegetables from that garden you spent time maintaining.
Or perhaps you like jelly and want to give some as gifts maybe for Mother’s Day? You can do that with canning, too.
Here we will break down the basic canning tools and equipment needed for effective and safe canning. It is a lot more affordable than you think and a lot of fun.
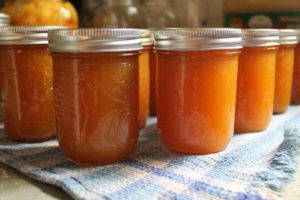
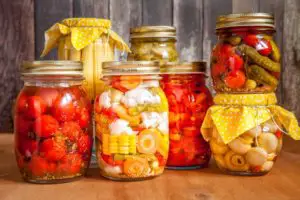
Canning Jars

Mason Jars are the nucleus of canning. You cannot use just any jar. Mason jars are intended for canning, having been around for about 150 years (invented by John Landis Mason).
Jars must be strong and durable, so we recommend, without exception, buying jars specifically intended for canning. At this point, your choice is between regular canning jars or wide mouth canning jars.
Which one you use depends on the canning recipe and how you intend the contents to be used. Yes, many recipes specify the jar volume and jar type.
If you will remove the contents from the jar, use a regular jar. If you intend to open the jar and serve from it, use a wide mouth.
Reliable brands for canning include Ball, Kerr, and Golden Harvest. These are tough jars made of thick glass that can withstand impact and heating.
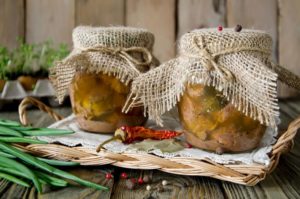
Canning Lids & Rims
Mason jar covers come in two pieces: a lid and a rim (or ring). The lid forms the seal and rim secures the lid during curing.
Even though they are basically interchangeable, you should ideally buy lids and covers in a set from the manufacturer of the jars you intend to use. Most of the time, jars are sold with their lids, so this is not a problem.
You can buy lid sets if you reuse your jars (like these from Ball), however, you should never, ever reuse jar lids for any food purpose. They are a one-shot item.
Important tip: After you can and your jars have cooled sufficiently (24 hours is plenty of time to be sure), you should remove the rim (ring) from your jars. There are several good reasons for this.
Over time, jar rims can rust and adhere to the lid, either locking it in place or possibly dislodging it and breaking the seal on the jar (which leads to spoilage).
Also, if there are any food residues on the outside of the jar (such as in the jar threads), mold can form between the rim and the jar and can grow into the lid seal, again causing spoilage.
Finally, if you get a bad seal, a tight rim can fool you into thinking everything is ok. If you have a good, hard seal on your jar, you do not need the jar rim to keep it intact.
Canning Funnel
You will definitely need a canning funnel to get the contents of your food preparation into the jars. This is a funnel with a very wide neck, close to the diameter of the jar (for example, this stainless steel, food-grade canning funnel by HOXHA).
Water Bath Canner (Canning Pot)
Canning food products involves a proper canning recipe (specific for canning) and a proper jar seal. This is achieved by heating the jar.
Sealed canning jars with food contents have a small headspace near the lid. During heating, the air in the headspace expands and pushes past the lid.
Jar lids have a rubber lip that forms a firm seal as the jar cools, the air contracts, and pulls a slight vacuum. Heating is performed by immersing the jars up to the neck in boiling water.
To boil the jars, you will need a large pot with enough depth for water and several jars. Although a very large stockpot will work, canning pots can be had at very affordable prices.
An important component of a canning pot is the jar rack. This serves two purposes.
One, jars are tough but not that tough. They should not sit directly on very hot surfaces, such as the pot bottom while boiling.
Second, many racks are formed to hold the jars and allow for easy retrieval from the water bath. We have used and recommend the Granite Ware 9-Piece Set (comes with canning accessories for about $35).
Canning Jar Lifter (Jar Tongs)

Although you can get by without a jar lifter (especially if you have a rack for your canning pot), they are a handy accessory to keep around. These are a pair of oversized tongs meant for extracting jars from hot water.
Many canning pots come in a set which includes a jar lifter (as with the Granite Ware set above). If you wish to purchase one separately, the Norpro 600 is a good one to get (you can even get it in a 6-Piece Canning Set with a funnel, bubble remover/headspace spacer, lid retriever, jar wrench, and regular tongs).
Bubble Remover/Headspace Tool
The bubble remover is a plastic spatula (never use metal, only wood or plastic) used to poke down into the food contents and dislodge any bubbles that form on the jar sides. This is important to prevent spoilage.
As an added bonus, most bubble removers also have a headspace gauge on one end. This is an extremely useful feature, particularly for those new to canning since the headspace cannot be either too large or too small for a proper seal.
So, your grandmother never needed one. So what? make life easy on yourself.
The Norpro set above includes this bubble remover. Also a good choice is this one by Ball.
Canning Food Equipment for the Recipes
There are some kitchen essentials you need for any canning recipe. These include:
- Stock pot (here’s a big one by Cooks Standard).
- Stirring rod (plastic or wood; no metal)
- Wooden spoon
Ingredient staples

Most canning recipes will require all the following ingredients, so these should be standard items in your canning kitchen.
- Pectin
- Lemon juice (from a bottle)
- Vinegar
- Sugar (or honey)
Happy canning!

Great information. Thanks!