
Candle making is something we enjoy doing to celebrate the winter solstice.
Candles help bring light during the darker winter days. I find enjoying candles helps a lot with those winter blues. Making candles yourself helps to slow down and enjoy the season of quiet hibernation vibes.
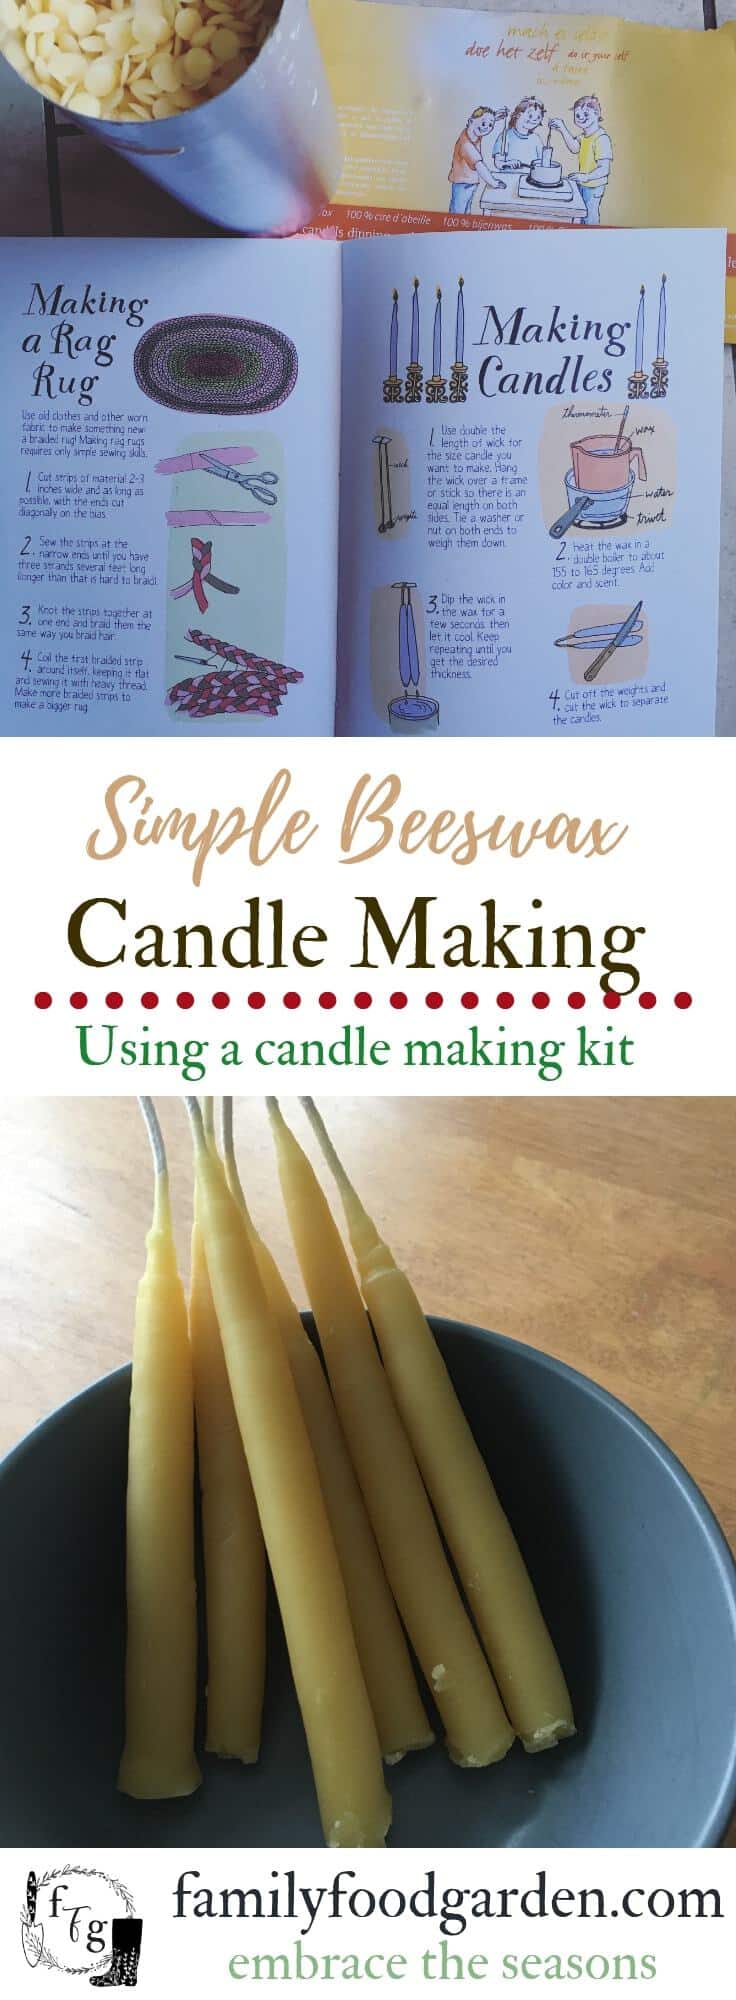
As we make candles with our kids, we started with simple candle making.
Using large beeswax sheets, the kids enjoyed rolling candles as an easy way to enjoy making candles.
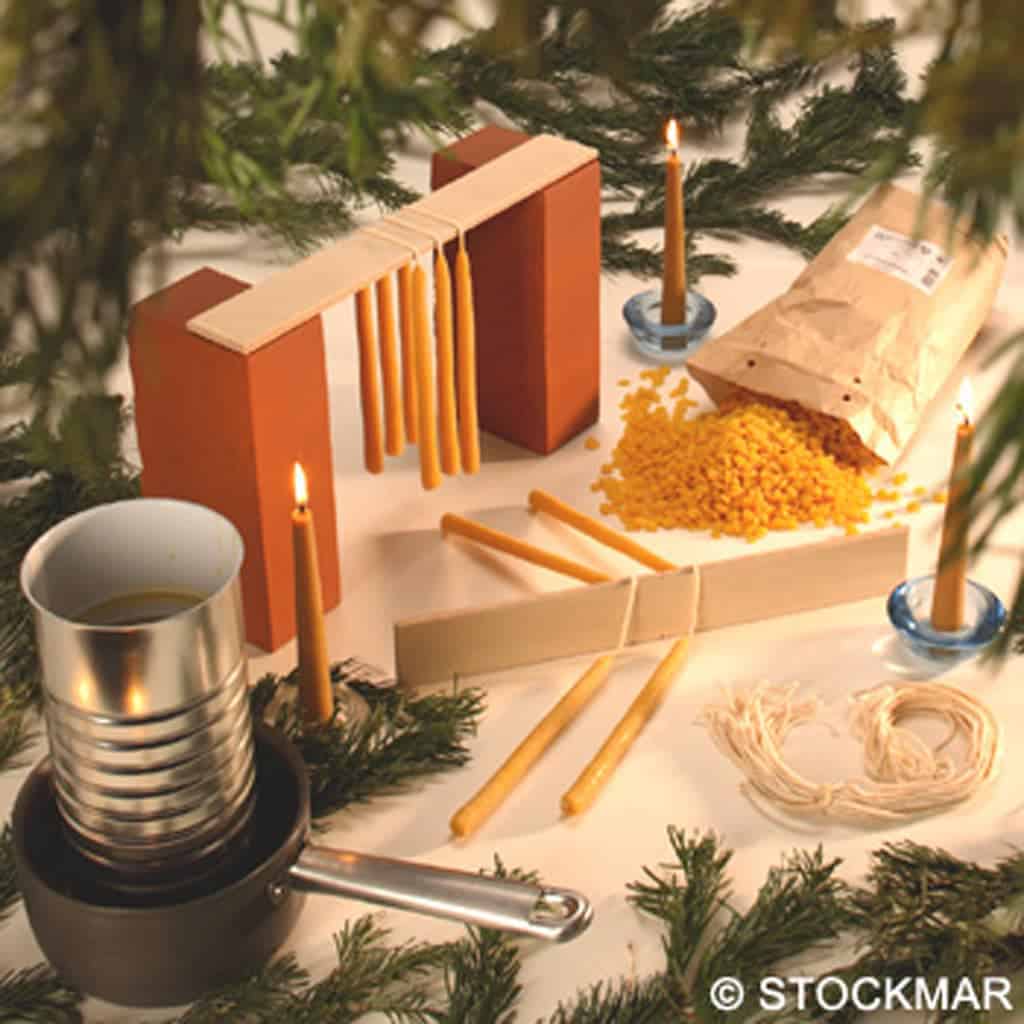
Beeswax Candle Supplies
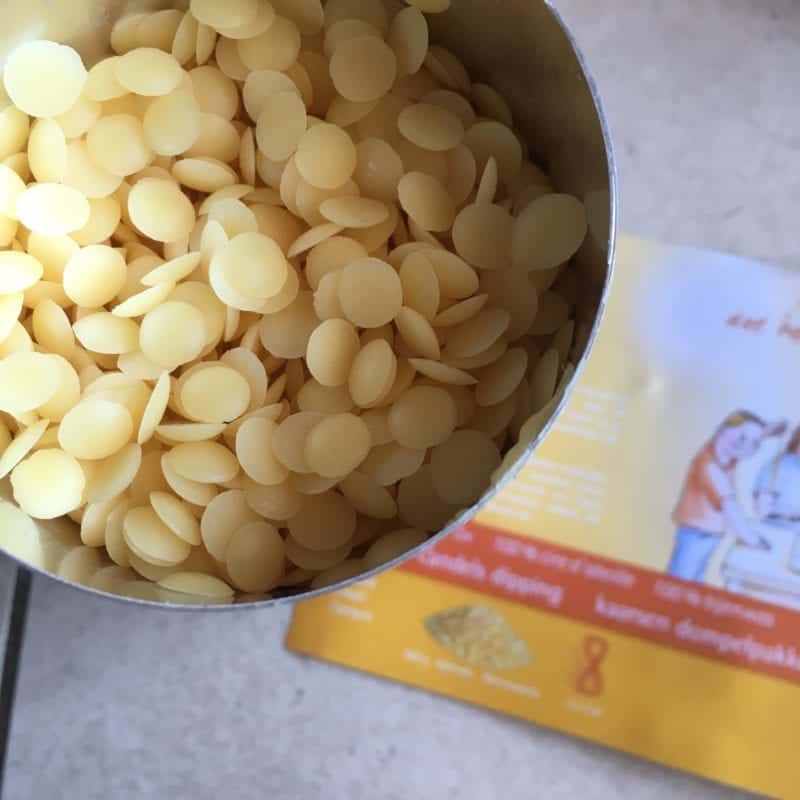
The kit included 100% beeswax, 3 sizes of wick, and 1 dipping tin. It didn’t include the weights, which are crucial to balanced candle making. I noticed a lot of the candle making kits use soy wax, which does tend to be a cheaper option.
Making Candles Using Beeswax Kit
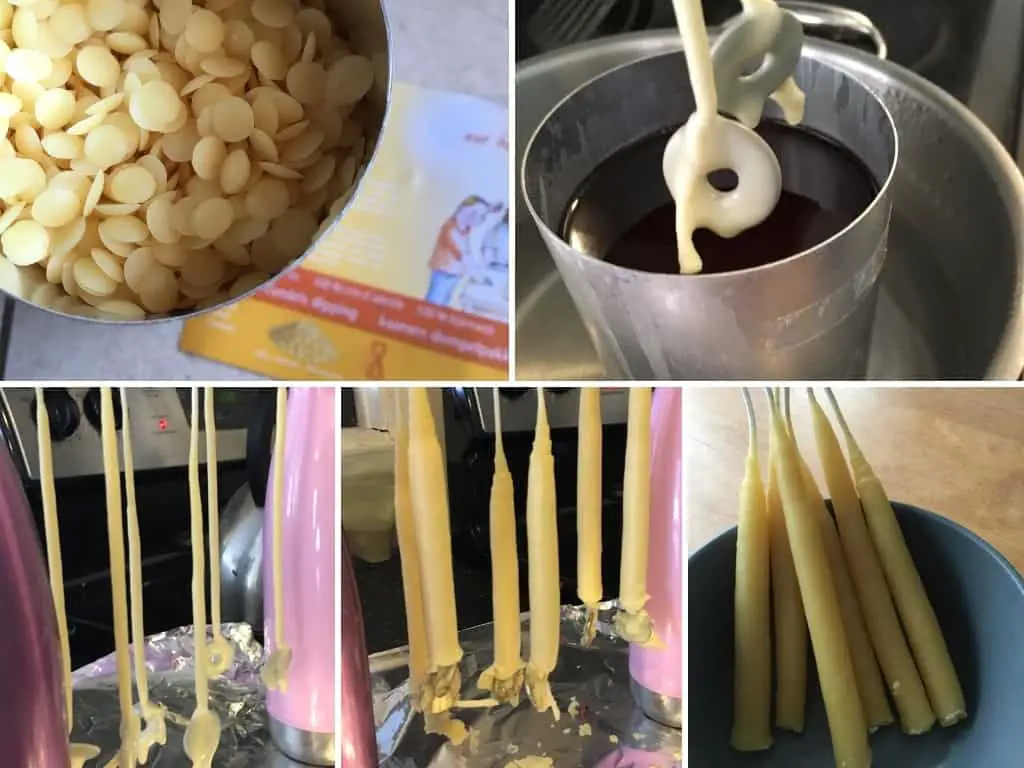
1. You will first prepare a ‘double-boiler’ for the beeswax pallets, with the included tin being the container to melt the wax, and a large pot of your own to boil water in. To begin, fill your large stockpot only halfway with water. Place the tall tin with beeswax pellets inside of the stockpot. In this manner, there is no water touching the actual beeswax pellets. Turn the burner to high heat. The temperature of the water should remain under 200 degrees Fahrenheit.
Hopefully you can keep your pot clean. It may still happen that some beeswax might drip into your pot.
Some people like to use a pot that they don’t worry about dripping wax as much, but it is possible with a careful handling to keep your pot clean, and the beeswax contained to the tin.
2. As the wax is melting, you can prepare the candle wick. You can make just one candle at a time, or you can use a longer string holding it in the middle with both ends dipping in at the same time to make two candles at once.
It’s helpful to tie little weights to the ends of the string; you might use hex nuts, fishing weights, pennies stuck together in a clump of soft wax.
If you do two candles at a time, then hanging them to dry afterwards will be easier for candles that are thicker diameter and need more time to dry. If you are only making very small diameter candles, then they won’t take long to dry, and doing one candle at a time is fine.
3. Test the wax temperature with the included thermometer. It should be 165 degrees Fahrenheit.
4. You’re ready to begin. For your first dip of the wick, you will seal the wick by dipping it into the melted wax to the desired length of the candle. Lift back out again into the air.
5. The wax should take about 4 seconds or so to air harden once the wick is lifted out of the melted wax. Re-dip once more, and then immediately plunge into cold water bath. Repeat Steps 4 & 5 until your candle reaches the desired diameter.
6. For some old-fashioned charm, hang the finished candles over a broom balanced on two chair backs, making sure the candles don’t touch each other. Leave them to harden for a day in a cool, draft-free spot. Cut off the weights, and re-dip the ends to have the bottoms be more tapered.
Note: The beeswax pellets reduce in volume when melted. We advise you to keep a refill bag with beeswax pellets from Dipam, or simply melt down your remnants from your old beeswax candles.
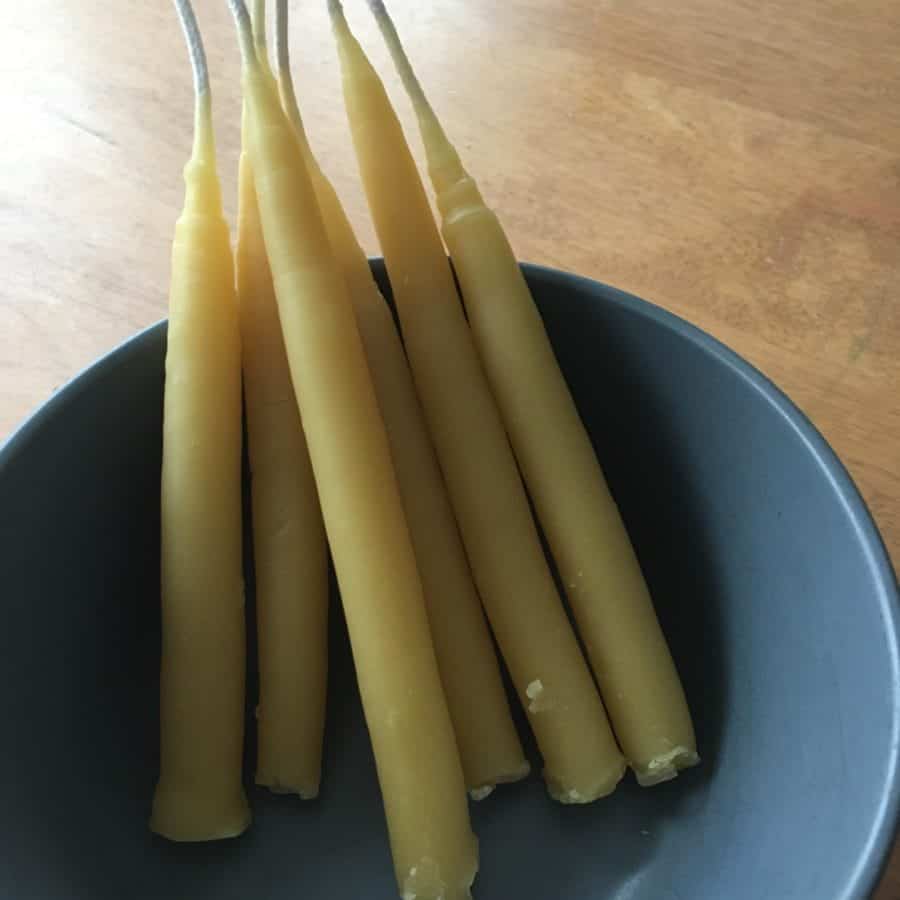
Once we finished making our first set of candles we cut off the weights and gently removed the wax back into the melting pot. Then you want to cut off the bottoms so that they are flat.
Candle making was so enjoyable and it’s definitely become a wonderful seasonal tradition for our family.


This beeswax candle making kit sounds like the perfect activity to enjoy with my family and create some cozy vibes in our home!