A bean teepee is a beautiful garden structure that houses climbing beans for easy picking in a vegetable garden. Children love bean teepees because they get to hide in a shaded garden fort with an endless supply of nutritious beans for healthy snacking.
Been teepees structure easily, and the beans proliferate well over warmer months.
Equipment & Design
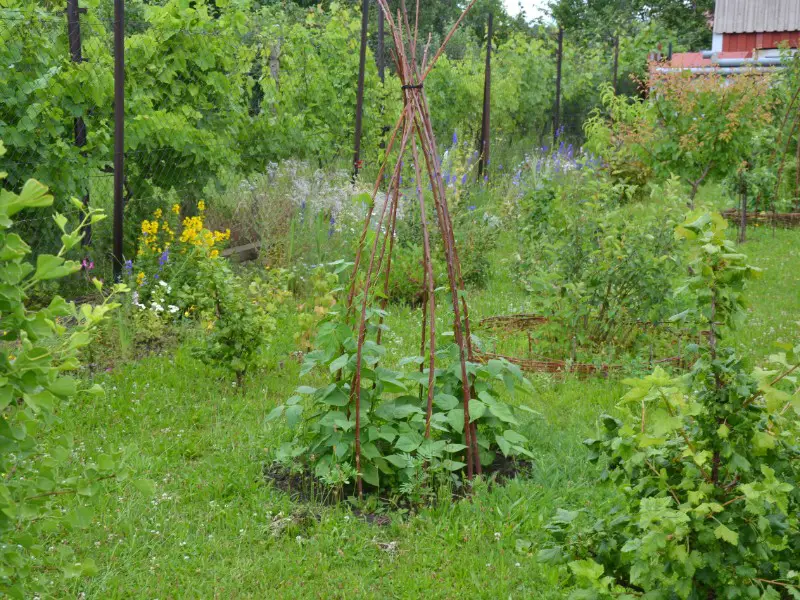
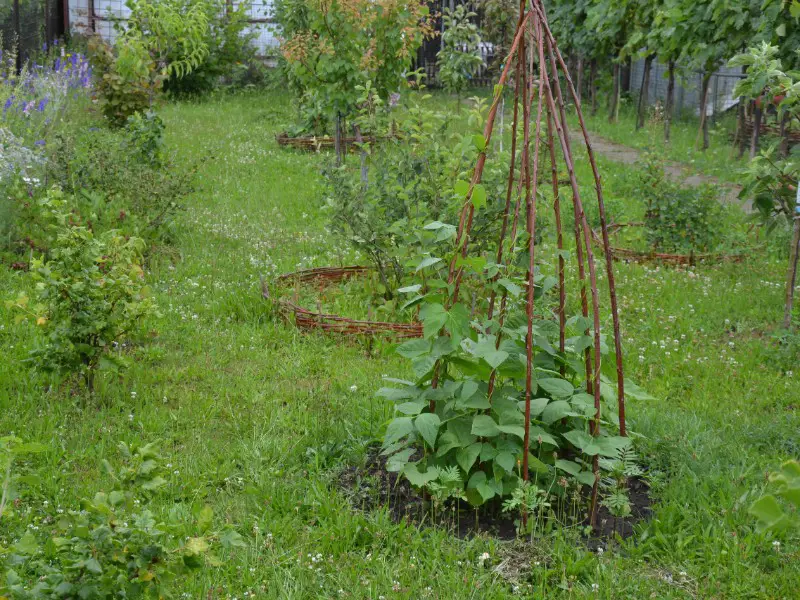
Bean teepees look like Native American teepees. The structure’s design is bamboo poles held together with string. The walls are covered with climbing beans instead of traditional fabric. Bean teepees have 3-foot-wide doorways for easy picking and playtime fun.
The height of the bean teepee should accommodate a standing child who plays hide-and-seek while nibbling on fresh beans. The ideal height is 6 feet from the ground to where the poles are tied. The base of the teepee should be 5 feet wide to prevent children from knocking it over.
Children should be able to move around inside the teepee, and the added space allows adults to enter the teepee to pick beans. Bean teepees offer an aesthetic value to spring and summer gardens.
Bean teepees reduce the threat of frostbite to the plant, because the shape harbors warmth. Nighttime temperatures over 55°F are ideal for building bean teepees and planting seeds.
Easily build a bean teepee by locating it in the perfect spot in your garden, and using equipment that makes construction a breeze. Automatic watering will further make bean cultivation easy, and the addition of flowering vines will give your teepee style.
The Best Spot for a Bean Teepee
- Receives at least five hours of sun daily
- Isn’t in the line of gusty winds
- Space measures 5×5 feet
- Loose, fertile garden soil at least 18 inches deep, where plants and weeds grow well
Equipment for Building a Bean Teepee Includes:
- Six to eight tent pegs
- Six to eight 10-foot bamboo poles, thin dowel rods, or plastic tomato stakes
- Garden twine
- Kitchen string
- A rubber mallet
- A staple gun
- Compost if the soil is clay or infertile
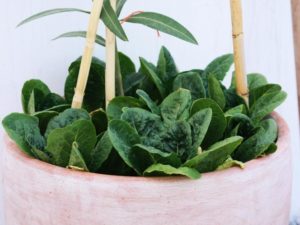
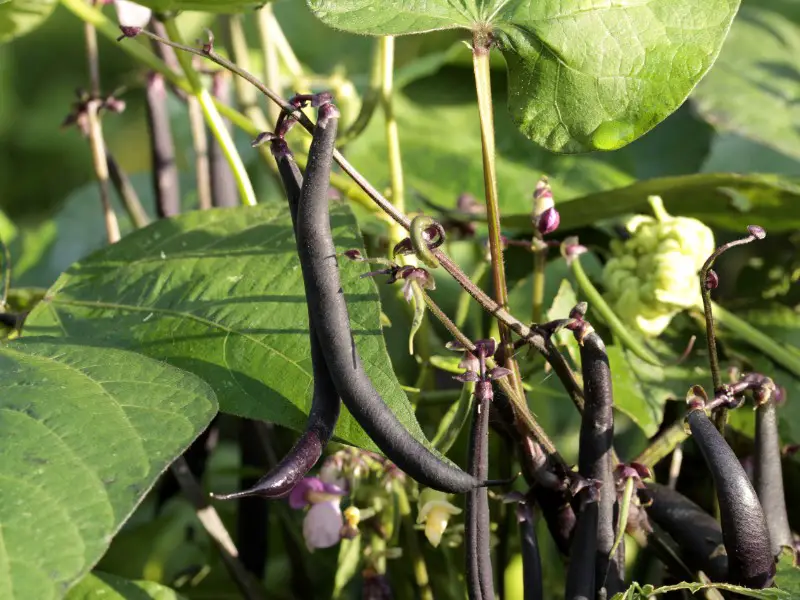
- Climbing bean seeds or seedlings
The Best Climbing Bean Seeds Include:
- Pole bean
- Kentucky wonder
- Kentucky blue
- Scarlet emperor runner bean (it has beautiful red flowers)
- White lady bean
- Redrum bean
- Polestar bean
- Asian winged bean
- Lazy housewife bean
- Rattlesnake pole bean
- Blue lake pole bean
Optional Watering Solution
The beans need a lot of water to grow in the high spring and summer temperatures. A simple homemade sprinkler hose prevents children from getting too muddy when playing inside the teepee. The hose provides a slow yet steady flow instead of a gush of water.
Prepare an automatic watering system to wrap around the teepee:
- Cut a thin, 10-foot hose that runs around the teepee twice
- Use a hole-puncher to turn the hose into a sprinkler with fine holes
- Wrap the hose around the teepee before the vines climb up the shoots
- Connect the hose to a tap for daily sprinkles
Optional Flower Addition
Only scarlet emperor runner beans have red flowers. Add flower climbers to the bean teepee for extra pizazz and color. Only add one flowering seed for every two climbing bean seeds. Don’t add fragrant vine flowers that attract bees to bean teepees if kids play inside the teepees.
The best flower climbers to add include:
- Heavenly blue morning glories
- Nasturtiums
- Sweetpeas
- Moonflowers
- Honeysuckles
- Hyacinth beans
- Cypress vines
- False hydrangea vines
How to Make a Bean Teepee (Step-by-Step Instructions)
Constructing a bean teepee is exciting, and children can help if they want to get involved in gardening. Give a child a small shovel to help prepare the soil and plant the seeds.
Follow these steps to build a bean teepee in the garden:
Step 1: Prepare the Soil
Loosen the soil over the area in which the bean teepee will stand. Use a shovel to dig 18 inches into the ground. Combine compost with the earth should it not be fertile, or if it has clay. Organic and mushroom composts work well for vegetable gardens.
Step 2: Arrange the Pegs
The tent pegs help define where each bamboo pole goes into the ground. Plan to keep a 3-foot doorway open. Space the tent pegs in a circle to cover the rest of the 5×5-foot area. A distance of 20 inches between the pegs is ideal. Knock the pegs into the marked spaces.
Step 3: Exchange the Pegs for Poles
Replace each tent peg with a bamboo pole. Use the rubber mallet to knock the thick bamboo poles into the soil at a 45° angle, 18 inches deep. Repeat the exchange until each tent peg is replaced. The sticks should lean toward each other in the middle.
Step 4: Tie the Poles
Use the staple gun to attach the end of the garden twine to the top of the bamboo shoots just below the point at which they cross each other. Work the string around the cross to construct a firm holding between the poles, and staple the end piece of twine to the same place as the first.
Step 5: Weave the Kitchen String
Once the teepee frame stands sturdy, use the kitchen string to run circles around the perimeter. Use the staple gun to affix the start of the string, and turn the string tightly around each pole. Start at the bottom of the teepee and run a loop around the frame 10 inches above the ground.
Run the string to the next pole, and turn it tightly around the pole. The kitchen string should be just tight enough to pull the structure together, but not so tight as to collapse the teepee inwards. Repeat the stringed circles around the entire teepee frame every 10 inches until you’ve reached the top.
Step 6: Mound the Soil
Create soil mounds around each bamboo pole now that the structure is ready. Each soil mound should easily house two bean seeds 3 inches apart.
Step 7: Plant the Beans
Use your fingers or the fingers of your little garden helper to press a 1-inch hole into the soil mounds on each side of the bamboo shoot. Don’t plant any seeds in the teepee’s doorway.
Step 8: Water the Bean Seeds
The bean teepee should be centered in a sunny place, where it will need moist soil. Water the bean seeds every morning before the heat rises from the ground, and water the seeds again after the sun finishes peaking in the late afternoon.
Don’t spray the seeds or seedlings with a flood-worthy hose. A gentle sprinkle is better for seeds and seedlings.
Step 9: Assist the Teepee to Climb
The beans sprout in one to two weeks. Allow the beans to grow to the height of the first string circle around the bean teepee frame. Gently attach the ends of the bean sprouts to the bamboo poles and string framework by loosely tying them with kitchen string.
Step 10: Pick the Beans
Pole and climber beans take 65–80 days to provide healthy beans. Pick the beans from inside the bean teepee once a week to allow the plant to flourish throughout summer. Remove wilted flowers from flower vines once weekly if you’ve planted them as an optional extra.
Leave the beans to wilt and drop seeds by the last two weeks of summer.
Step 11: Remove the Structure
Bean teepees can be removed after the season ends, or the design can stand until the new season. Go through the above steps again at the beginning of the new season to make bean teepees sturdy again using last season’s structure.
Bean Teepee Benefits
Bean teepees are gorgeous garden structures that double as vegetable-picking-made-easy. Making a DIY bean teepee increases the beauty of any garden and is an effective method for growing multiple types of climbing beans.
Bean teepees also appeal to children who enjoy the responsibility of vegetable gardening with their parents. Kids love playing hide-and-seek, reading their favorite books, and eating healthy snacks inside bean teepees.